Valid for: Maya 8.5 and above. Tools used:
Create Polygon Tool, Mirror Geometry, Smooth, Create UVs, Blend Shape, Joint Tool, Smooth Bind, Attach to Motion Path. Goal: modeling and animating a simple fish with a simple skeleton and blendshapes
First
Step : Modeling of the
fish.
To start, you need a picture of a fish, side view. Of course, you can model
another character if you like.
1- Picture. The first step is to show the picture in the side view of Maya. Go to the
side view, and, in the view window, select View->Image Plane->Import Image
from the menu. Choose
the correct image. You can later put it in a layer to disable the view of the image.
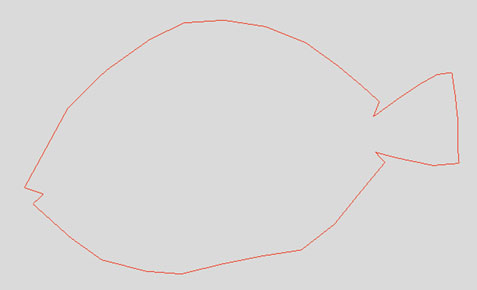
2- Contour. The second step consists in creating the outline of the fish (the silhouette).
Select the "Create
Polygon Tool" (In the "Polygons" main menu, click on Mesh->Create Polygon Tool).
Draw the contour of
the fish. Each mouse click creates a point. The first and last point are
linked by a segment (the profile is necessarily a closed curve). When you have
enough points, click Enter. You should get something like this:
3- Interior polygons. The third step consists in creating inside polygons
at coarse resolution. Select the tool "Split
Polygon Tool" (Edit Mesh->Split Polygon Tool)
You need to create lines that are more or less parallel to the
silhouette. Create the short lines first. In the case of the fish, first
create the vertical lines, by clicking on one edge on top, and one edge at the
bottom. Then, create the horizontal lines. You'll probably get a nicer
result if you click on each intersection with the vertical lines. You should
obtain something like this:
4- Inflate interior vertices. When you are happy with your
mesh you need to add some volume by moving the inside vertices you have
created. Do not move the vertices that are on the border,
because you will mirror the geometry later. Only move the inside vertices (on
the X-axis). Use the side and front views, and eventually the perspective
view, but make sure you only inflate in the direction of the X-axis.
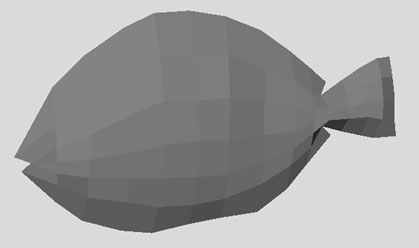
5- Mirror geometry. When you are happy with the
volume of the half fish, select the mesh and mirror it to have a full fish
(menu "Polygons": Mesh->Mirror Geometry->options). Make sure you select the correct direction in
the options to have the correct result (normally, it should be mirrored around
-X). You should obtain this result (here, we don't really see the other side):
6- Create high resolution mesh (this step can also be done after 7 in
which case you have less vertices to manipulate to create the texture
mapping. However, in that case, you might need to re-adjust the UV mapping
for the newly created vertices). To smooth the mesh and obtain a high
resolution, from the main menu "Polygons", select your mesh, click on
"Mesh->Smooth". You can do as many smooth as you want, but usually one or two
in enough (it depends on the resolution you want).
7- Texturing. The next step consists in adding a texture. For this, you first have to
setup a correct UV mapping. Because you started with a picture of the fish from the
side, the best is to use a planar mapping. In addition, to avoid any
additional distorsion, rezise your texture image so that it has the same width
and height (i.e. copy paste your image into a blank image with square
dimensions -- take the biggest one, don't make an anisotropic scale ...)
Create a new shader. Open the Window->Rendering Editors->Multilister.
With a right click in the top black window, select "Edit->Create..." and click
on "Lambert". This will add a new sphere in the top window of the
Multilister. Then, you need to assign the texture to the shader. If you
double click on the sphere you have created, the options will appear on the
rightmost window of Maya. Click on the small chess square of Color. In
"Textures", select "File" (second icon in the second row). In the "Image
Name", select the small carpet and load your texture file. The "Texture
Sample" should change color.
Assign the shader to your mesh. There are many ways to do this step. In
any case, first select your mesh. From the "Rendering"
main menu, "Lighting/Shading->Assign Existing Material->Lambert 2 (choose the
correct number, check in the multilister) OR right click on the Lambert 2 (in
the Multilister window) and "Edit->Assign".
Create a correct UV mapping (main menu "Polygons"). Go to the side view, select
the mesh and "Create UVs->Planar Mapping->options": check "Fit projection
to: Bounding box", "Project from: Camera", "Keep image width/height ratio: on"
and "Insert projection before deformers: on".
Now, if you click on "6", you should have a rendering of your model with
a texture. If you don't see anything, make sure that, in the window you are
working on, from the menu, "Shading->Use default material" is un-checked.
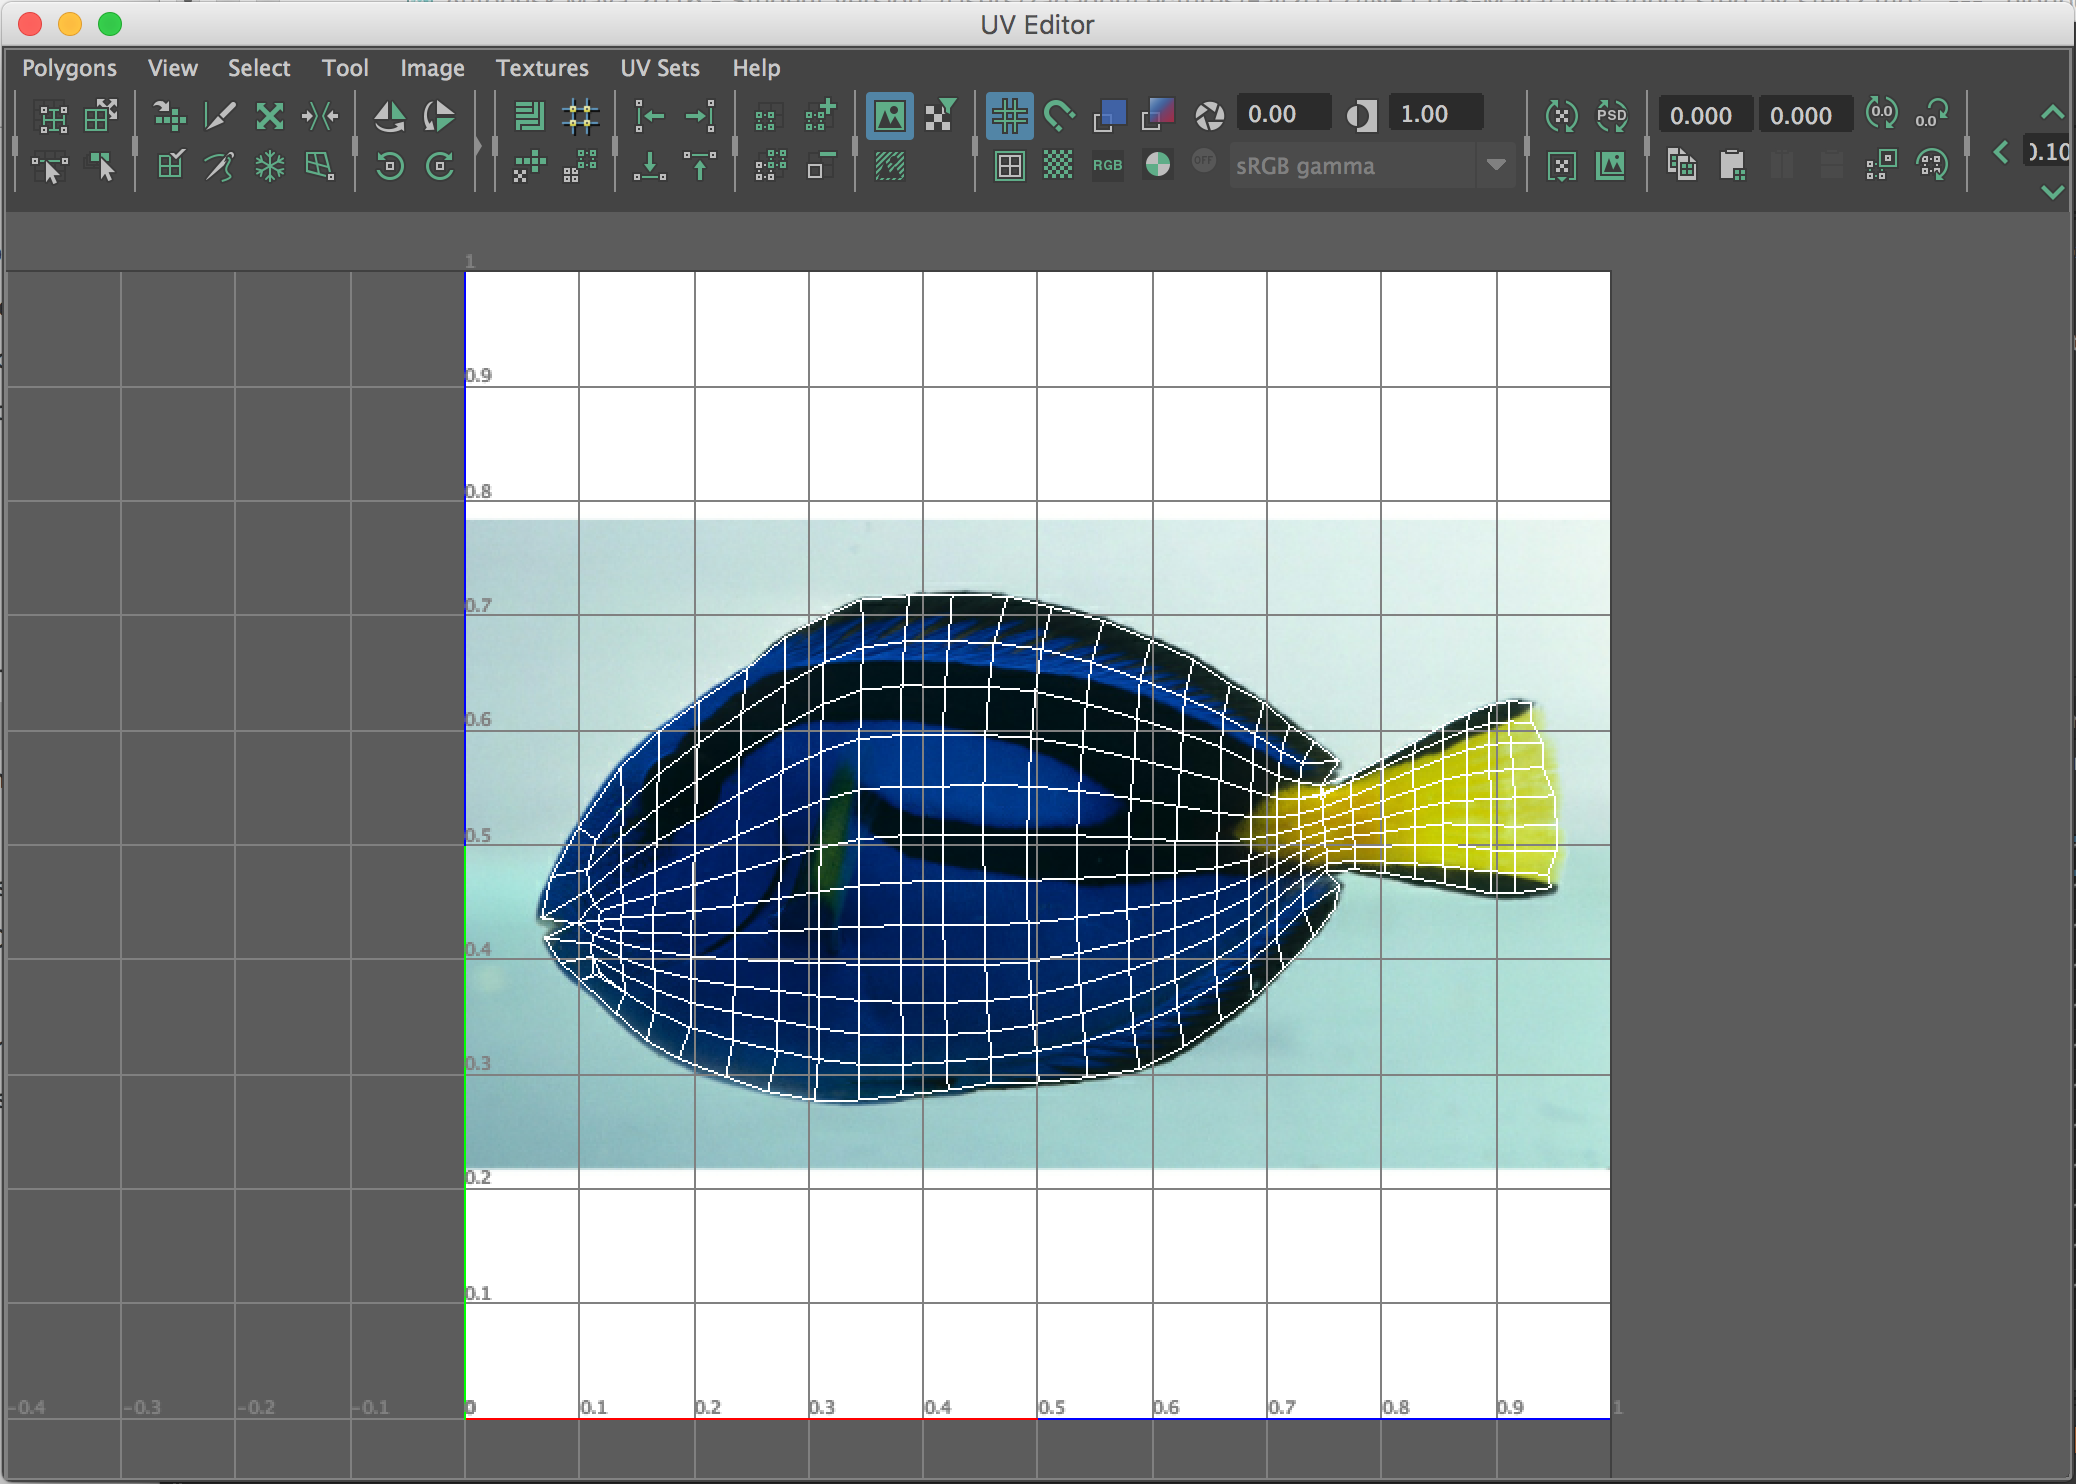
The projection is most probably not very good. To improve the position of the UVs, select the mesh and open the UV editor:
"Window->UV Texture Editor". This shows a 2D view of your texture as well as
the points of your mesh. If you don't see your picture, check the following
icons: "Display image" should be "on"; "UV Texture Editor baking" should be
"on" and click on "Display RGB channels". You need to move the points so that it perfectly
fits the picture. Use the translating and rotating tools like in the 3D
view. See example below:
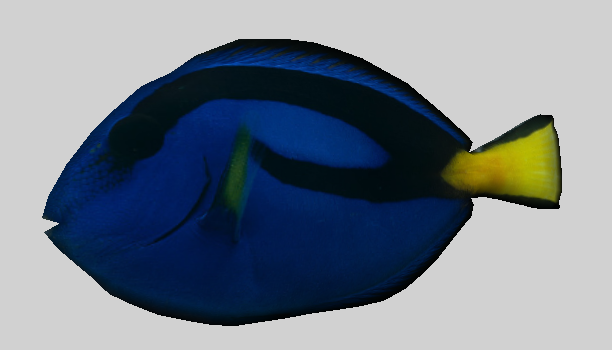
At this point, you should have a high resolution textured fish.
Second
Step: Animation Setup
If you plan on using both, Blendshapes and Skinning, you first need to create
the Blendshapes. You then create the Skeleton and the Skinning.
1- Blendshapes (before the skinning to avoid problems).
First, you need to duplicate your mesh to have one fish per expression/keyshape
you want to have. Make sure you create independant expressions. Select the
mesh and, "Edit->Duplicate".
Model one expression/keyshape on each of the duplicated fish (do not modify the
original one).
Create the blendshapes. From the "Animation" main menu: Shift select all of the
duplicated meshes and the original last; Create Deformers-> Blend Shape).
To see the blendshape sliders and see their effect, open the blendshape editor:
Window->Animation Editors->Blend Shape.
2- Skinning
First you need to create
the skeleton. In this case and for simplicity, we're gonna use only two bones
(3 frames). Create
them using the joint tool: from the "Animation" main menu, "Skeleton->Joint
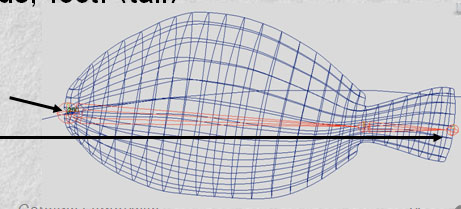
Tool". Each mouse click creates a frame. The first frame is the root. Start from the head of the
fish towards the tail. You should obtain the skeleton depicted in this figure:
Then, you need to bind the
mesh to the skeleton. Shift select the mesh and the root of the
skeleton and click on "Skin->Bind Skin->Smooth Bind".
To correct the skinning weights, use "Skin->Edit Smooth Sking->Paint Skin
Weights Tool".
Third
Step: Create an Animation
We are just going to see
rapidly 2 types of animation: Forward Kinematics (FK) and Motion Paths
1- FK. First we will make
an ondulation movement of the fish's tail.
Make sure you are on frame 1 in the timeline.
For each joint, in the Attribute Editor, highlight the Translate
attributes (X, Y and Z) and right click->"Breakdown Selected". For the root
joint, also select the RotateX,Y,Z attributes.
Check the auto key (the key
icon to the right of the timeline must now be red)
Now, you can create your animation. For example, go to frame 10 (click
on frame 10 in the timeline), rotate the middle
joint so that the tail of the fish bends to the right (or left)
Go to frame 20 and put the rotation to 0, so that your fish is in the
same position as in frame 1
Go to frame 30 and rotate the middle joint in
the opposite direction compared to frame 10
Go to frame 40 and put the
skeleton in the original position
You now have enough keyframes to be able to create an infinite movement.
To do this open the graph editor: "Window->Animation Editors->Graph
Editor". Select all the joints except the root joint and apply "Curves->Pre Infinity->Cycle" and "Curves->Post
Infinity->Cycle".
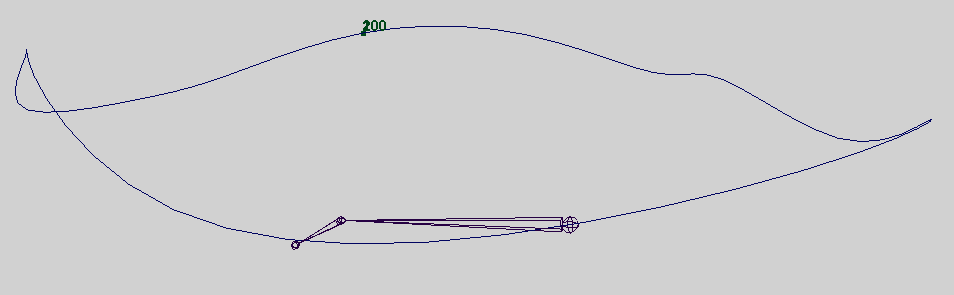
2- Motion Paths. The idea is to create a circular path that the fish can
follow (like in an aquarium ).
Create a spline curve. Either with the NURBS primitives
(Create->NURBS Primitives->Circle) or using the curve tools (Create->CV
Curve Tool ; EP Curve Tool). The curve will become the path of
the fish.
Move the skeleton so that the root is on the spline curve.
Shift select the root of
the skeleton and the spline curve and apply "Animate->Motion
Paths->Attach to Motion Path" (from "Animation" main menu). Play with the options to decide how many frames the
fish will take to travel through the curve.
Optional: Underwater Caustics
If you want to create underwater caustics like in the video, there is a simple
trick to do this without heavy computations.
Create a light if you don't have one (a directional is
perfect) using "Create->Light". Orient it to simulate the light of the sun going through the
water surface.
Open "Window->Rendering->Hypershade".
Create a "Maya->2d textures->Water Node".
Right clik on "Water Attributes->Wave Time" and choose "Create New Expression".
Inside the Expression zone of the Expression Editor write this expression "water1.waveTime=time/10.f;"
and click on "Create" button. If your node name is not water1 put the
correct name inside the expression.
Now connect the outColorR channel from the water node to
the Intensity channel of the directional light via the connection
editor like this:
Open "Window->General->Connexion Editor".
Select the water node inside the Hypershade under the Textures tab.
Click "Reload Left" inside the Connexion Editor.
Select the Directionnal Light Shape inside the Outliner.
Click "Reload Right" inside the Connexion Editor.
In the Outputs section select "outColor->outColorR".
In the Inputs section select "intensity".
To improve the result play with the attibutes of the water node.
For questions concerning this tutorial, contact maya