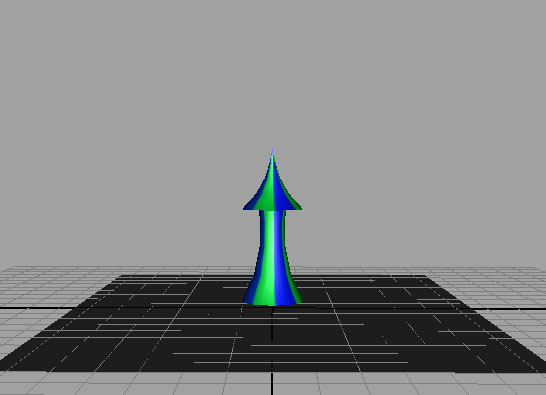
Rocket Take-off


Valid for:  Maya 2008 - 2009
Tools used: Fluid Effects
Goal: simulate fire and smoke during a rocket's take-off


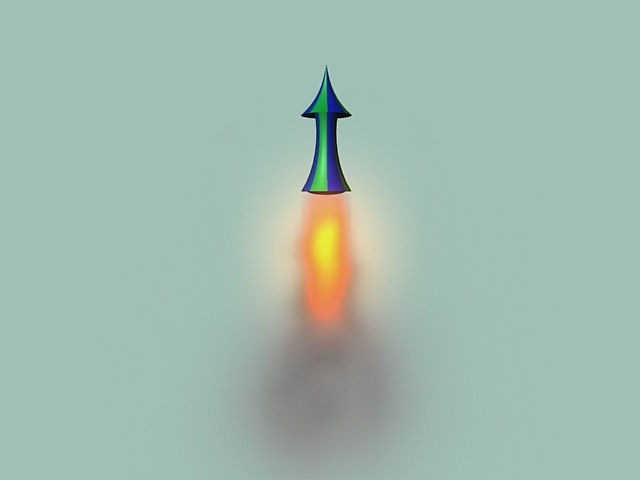
Global overview:

    In this tutorial we are going to see how to use and setup Maya fluids for simulating a rocket's take-off. The movement of the rocket in itself is not a simulation but an animation by hand. The only simulation is the one of the fire and the smoke emission.
    Before starting just a few words on Maya fluids simulation. If you think you'll be able to make water or liquids with this tool, you have to change your mind. In fact it's created for making gas simulations like smoke, fire or clouds and it's not really suitable for liquids. For those there are good solutions that you can interface with Maya like Glu3D or Realflow.
    Maya fluids system is based on 2 main objects: a container and an emitter. Each fluid simulation needs one container and one or more emitters.
        The container is a cubic zone inside of which the fluid will be simulated.  There is no possibility for the fluid to go out of this zone as it bounces on the walls of the container.
        The emitter is the source of the fluid, like for particles.

    There are not many tools necessary to drive a fluid simulation in Maya. The philosophy is the same as the one for particles: you can add some fields to drive your simulation but the main job is to setup your fluids parameters. The main parameters are the ones of the fluid stored into your container shape node. The emitter stores the main emission attributes of the fluid.

Reminder:

    Fluids simulation like particles or rigid and softs bodies is a dynamic simulation animation so it is important to play every frame of the timeline to see the result.  You cannot go directly to the frame X because for computing the status of the simulation for the frame X Maya needs the state of the simulation at the frame X-1. Because of this, it is very important to switch your Playback speed to "Play every frame" so that when you play the simulation Maya will compute every frame. It can work well in real-time speed too, but only in the case your simulation is very light and your computer powerful. If your simulation becomes more complex Maya will take too much time to compute the result of 24 frames in a second. So if you are in real-time playback speed it will jump over some frames to maintain the framerate and miss the computation of those frames for the dynamics so your results will be wrong. So be sure to check your Playback speed (inside Window->Settings/Preferences->Preferences->Settings-> Time Slider).

Now we can start the rocket. The first thing to do it to model a rocket using NURBS Primitives like in this tutorial or any other technique (click here to learn how to create a polygonal model). Then, store all of the objects composing the rocket inside a group using the command Edit->Group or hitting "g" key.

The rocket:

Needs:
A model of a rocket.
In the case of the rocket take-off we will use two fluids: one for the fire and another one for the smoke cloud.

Preparation step:

  1. Import your rocket in a new scene.
  2. If your rocket is not inside a group group it (in case there is more than one object).
  3. Move the locator of your group to the botton of the rocket (translate tool and keep "d" down or del key).
  4. Give your rocket a height of around 5 units (scale the group to meet this value).
  5. Translate the rocket so that you place the pivot in (0,0,0)
  6. Create a polygon plan to simulate the floor under your rocket.
  7. Create a layer and put your objects inside.
    Result:


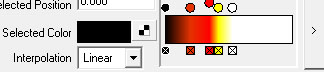
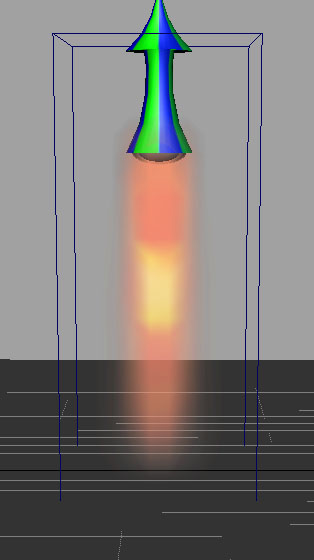
First Step: The Fire

  1. Create a container for your fluid ( menu Dynamics, Fluid Effects->Create 3D Container ). We don't use Create 3D Container with Emitter because we are going to create our own emitter.
  2. Now you have a container in your scene which is a cube. In our case we are going to do a vertical movement so we need a container which is bigger in Y axis than in X and Z axis.  For this instead of playing with its scale open the attribute editor. In the container properties change the size to 6/15/6.  In the resolution change the Y value to maintain a proportional coefficient between the resolution and the size.  For example if for a 10 size you have a resolution of 6, then for a 20 size put a resolution of 12 (be careful not to put a too high resolution for the moment).
  3. Translate your container so that the bottom is in -1 in Y and it is centered in 0,0 for X and Z axis.
  4. Creation of the emitter:
    1. Create a NURBS sphere.
    2. Put its EndSweep to 180°.
    3. Fit it correctly to your rocket's reactor output (flatten it a little too).
    4. Select your new sphere and your container and transform the sphere in a fluid emitter (Fluid Effects->Add/Edit Contents->Emit from Object).
    5. The last thing to do with the emitter is to create the take-off animation. This is done by keyframing the movement which is a simple Y translation.  The emitter starts near the bottom of the container and finishes near the top. Make sure that your emitter is always inside the container (in our case we do the movement in 90 frames).
  5. Now if you play the animation you will see that a fluid is simulated but it's yet far away from the result we want to have. It's time to play with the fluid attributes.
    1. Use the shaded display for your persp view and open the attribute editor of the container to change the following attributes:
    2. "Contents Method" zone:
      1.  Temperature -> "Dynamic grid"
      2.  Fuel -> "Dynamic grid" (this parameter tells Maya how to compute the attribute during the simulation).
    3.  "Dynamic Simulation" zone:
      1. Gravity -> .98 
      2. Viscosity -> .3
      3. Friction -> .2
      4. Uncheck Conserve Mass
    4. "Contents Details" zone:
      1. "Density":
        1. Density Scale -> 1.0
        2. Buoyancy -> 1.0
        3. Dissipation -> .1
        4. Diffusion -> .1
      2. "Turbulence":
        1. Strength -> 1.0
        2. Frequency -> 8.0
        3. Speed -> 1.0
      3. "Temperature":
        1. Scale -> 5.0
        2. Buoyancy -> 1.0
        3. Dissipation -> 0.3
        4. Diffusion -> .15
        5. Turbulence -> 1.0
    5. "Shading" zone:
      1. Glow Intensity -> .2
      2. Color -> Light Grey color (we don't really use the color channel to make the fire color but the one of incandescence so we just need a neutral color).
      3. Incandescence: play with the parameters and render your scene to see the result.
        Example:   
      4. Opacity: play with the parameters and render until your are happy with the result.
        Example:    
    6. "Textures" zone:
      1. Texture Color checked
      2. Texture Incandescence checked
  6. That's all for the fire. To improve the final aspect you can further play with the attributes. Afterwards, parent the rocket to the sphere emitter to obtain a taking-off rocket with it's fire output (see picture below).
    Result:
   

Second Step: The Smoke
      
    Here you have two solutions: importing a pre-computed Maya smoke animation or creating another fluid simulation.

The first option is interesting to learn a different way of creating fluids. To import the fluid animation, open the Visor (Window->General Editors->Visor), and, in the Fluid Examples tab, in the section Smoke, choose for example Puffball.ma and import it by right clicking on the icon.  Once loaded you just have to change the keys for it's Y translation and scale if necessary.  Playing with it and with all Visor's fluid examples is a good idea even if it's not so easy.

The second option is to create a new 3D container, the exact same way as for the first step. Then, use the same sphere to create an emitter with Fluid Effects->Add/Edit Contents->Emit from Object and play again with all the attributes of the fluid.  I won't give you all the values for the attributes because it's not interesting. I'll just give you the main directions and the specificities for this case.
  1. The first thing is to drive the emission. The smoke is present at the beginning but doesn't follow the rocket so we need to stop the smoke emission quite fast.  For this you can keyframe the "Density/Voxel/Sec" the "Heat/Voxel/Sec" and the "Fuel/Voxel/Sec" values in the "Fluid Attributes" of the emitter attributes. When they are at 0 there is no emission. You can thus play with this to stop or start the emission.
  2. Then you have to drive the simulation by tuning the attributes of the fluid.
    1. Here we want to simulate a cloud of smoke so we don't need to simulate the temperature (so no need to use a dynamic grid). 
    2. The smoke needs to have a quite important viscosity because it's a very dense heavy smoke (so in the "Dynamic Simulation" zone, Gravity can be set to 4 for example and viscosity to 1). 
    3. The density of the smoke is an important component of the result so play a little with the "Contents Details->Density" zone with a quite low dissipation but a more important diffusion.  The other zones inside "Contents Details" are less important (only if you want to add more turbulence).
    4. The most important part is to work on the "Shading->Color" to give the cloud a nice aspect. For this, I use as Color Input: Density and for Interpolation: Smooth and a variation of grey as the Selected Color. 
    5. Example:   
    6. The result won't be visible directly. You need to check "Texture Color" and "Texture Opacity" with  "Texture Type" set to Perlin Noise in the "Textures" zone and play with the attributes (Threshold, Amplitude Frequency ratio ...).
Results:

With the first solution:

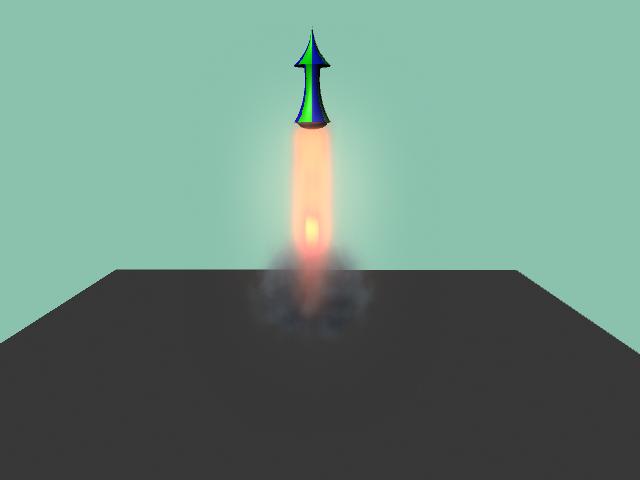
With the second one:


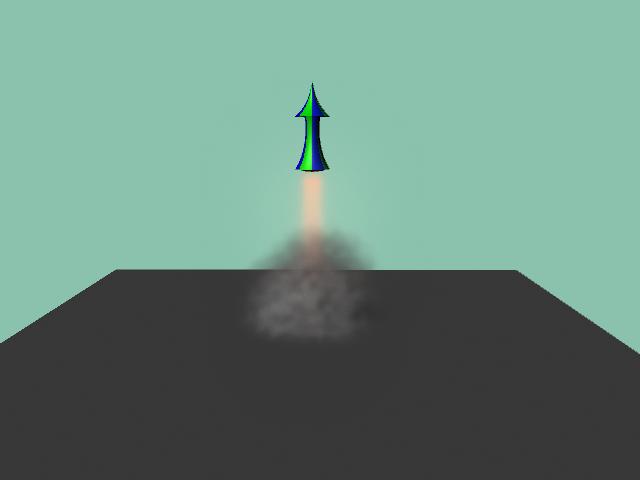
Here, you can see 3 movies showing different setups:
rocket_1.avi shows the setup of fire described in the first part of the tutorial and the Visor's smoke.
rocket_2.avi shows some changes in the fire setup and the second option for the smoke.
rocket_3.avi shows the result of using different values of the parameters for the same setup as rocket_2.

That's all folks !!!

Now you need to experiment to understand how to properly use the attributes. Maya fluids are not very hard to understand but the attributes are not easy to tune to obtain a specific result.

In this tutorial I don't speak about rendering but when you are happy with a simulation, try to improve the resolution of the containers. The results will be better but the real-time display will not be possible anymore.  For example you can use a container with 200 in resolution which is quite big but gives nice results and is commonly used in movies VFX.  The goal is to setup your fluid in a quite low resolution and after improve it before the rendering.


Copyright © Olivier Dumas
Tutorial written by Olivier Dumas